Cow Patty News
Monthly Newsletter
September 2002
The Anniston RC Flyers & Talladega Radio Control Club

God Bless Amereica
What is in the newsletter this month?
|
Orientation Awareness
By James Goss
I know this must sound like orientation 101 when you first started college and you will probably go to sleep at the beginning of class, but it has nothing to do with college and everything to do with R/C flying. I have often wondered what would be a good way to improve one's flying ability. Of course practice flying in the discipline you have chosen, be it fun fly, pattern flying, military scale planes, combat, pylon racing, or whatever, will allow you to become proficient in that area. Once we reach the point of being as adept as you are going to become, what do we do then? More practice may not be the answer in all cases, even though they say, Practice makes perfect. Sometimes practice makes boredom and boredom makes you want to get out of the hobby. I know because this has happened to me in years past and I have known numerous flyers that has gone through this same scenario, practice for three or four years, get bored and quit the hobby. When you begin to get bored with the hobby it is time to make a change. Now don't get me wrong, you will still need to practice your chosen and most loved R/C event, but you may need to change your style of flying also.
We are lucky because in the R/C hobby there are numerous ways to make the change. Simply try flying other types of planes from time to time and some that will challenge you in a different way. The reason I am so sure this method will improve your flying skills is because I have seen it work and it has worked for me as well. We all know that keeping up with the orientation of your plane is the biggest problem we face when flying our planes. Sometimes you may see the plane turning left when actually it is turning to the right. You give it the wrong input and you are really in trouble now, with luck you get it back under control. The more distant you are from the plane the more likely this is to happen. I have found that contrary to what you might think, we should practice getting our planes into these troubled situations so when we accidentally get our plane in a disorientated maneuver we will know instantly what to do for a rapid recovery. I call this orientation awareness and I really believe it will help you become a better R/C pilot no matter how long you have been flying and no matter what type flying you participate in.
For orientation awareness to be a successful venture for you I would recommend that you do not use your favorite planes, but instead pick you up a cheap fun fly plane. You are going to be flying very close to the field and very close to the ground so you can see your plane from a vantage viewpoint. This is the key to always knowing the orientation of your plane. With this cheap little plane you can purposely stall it at a low altitude and let if fall out on its own. Not knowing how the plane will react will give you a surprise every time and you have to make a quick decision for the correct inputs. If flying inverted gives you trouble then this will cure that in a hurry. With these planes you can do inverted flat spins or inverted tail touching, either will cure the fear of flying inverted. If you crash you haven't lost that much and just get another fun fly and start over. With these planes you can throw the sticks to the corners and if you are going to get disoriented this will do it, what will they do next? I don't know, but when you are 30 feet above the ground you have got to figure it out in a hurry. This is where orientation awareness comes to play, you will learn how to recover from these weird positions that your plane encounters and then you will be ready when your nice planes get into trouble to recover before they crash. These fun fly planes will give you an orientation education and you will not even realize you have been to college.
I think I have learned more in the last year about orientation recovery than in my entire R/C career combined. As most of you know I have developed a small fun fly plane called the Postage Stamp and have been having a lot of fun with it. I fly it very close to the ground and that requires a fast response at times. This is the best fun fly plane I have ever flown and I have flown quite a few. It is ideal for orientation awareness training and I would recommend it to all pilots regardless of what they primarily fly. It will give you quick reflexes and more confidence in your flying than any other plane could possibly achieve. So why don't you give it a try and see for yourself how orientation training can pay off for you. It is not going to teach you beautiful pattern maneuvers, but I can guarantee it will improve your recovery time when you are in trouble.
So let me sum up again what orientation awareness actually is. Obtain a cheap fun fly plane and fly the hound out of it while close to the ground. Throw the sticks to the corners and then recover before the ground catches you. I am convinced this will make you a better pilot in the long run. Experience is a good teacher and how are you going to get experience with being disoriented unless you create the situation on your own terms. This is only my opinion, but I really believe in the concept.
|
Elevon Setup
By James Goss
Elevon is a term that most modelers have heard of if they have been in the hobby for a while. For the new R/C pilots I will describe how elevons operate and when you need to use them. The term elevon is created by combining elev from elevator and on from aileron. I first started to use elevons about three years back when I built a Spinsation fun fly plane. This plane is almost a flying wing, but has a rudder rear of the wing and does not have separate ailerons and elevator. With elevons the elevator and aileron channels are mixed together to act as one unit. When you move the elevator stick, both ailerons will move as the elevator would in a standard setup. When you move the elevator stick, both ailerons will move as the elevator would in a standard setup.
For the last year I have been using elevons religiously on my new Postage Stamp Planes. It is a four-channel plane just like any other plane except it doesn't have separate elevators and ailerons. It is neat how the mixing works; you can operate elevators or ailerons and also operate them at the same time. In other words while you are holding the elevator stick in an off center position, you can also move the aileron stick off center to get aileron response. You will have to be careful and not program in too much elevator or aileron travel because the servos may reach their limit before full stick motion has occurred. It is best to keep the travel settings low when you program the elevons and adjust the control linkages to get your desired travel.
They are three ways to mix the elevator and ailerons, first and the easiest is to do it in your radio transmitter. Not all radios have this function but all computer radios will have it. You simply follow the manufactures directions and it only takes about five minutes to set them up. The second way is to use a mechanical mixer that gangs your elevator and aileron servos together. I have never used the mechanical mixers, but I have seen some disasters occur while other modelers were using them due to failure of the mechanism. The third way is to install an inline electronic mixer. This little device plugs in-between the receiver and the servos and will mix any two channels. They cost around $45, which makes the computer radios look even better.
So when you get ready to fly the Postage Stamp / PBF or any other plane that requires elevons, such as delta shaped planes, don't worry about it because they are very simple to setup, especially if you have a computer radio.
|
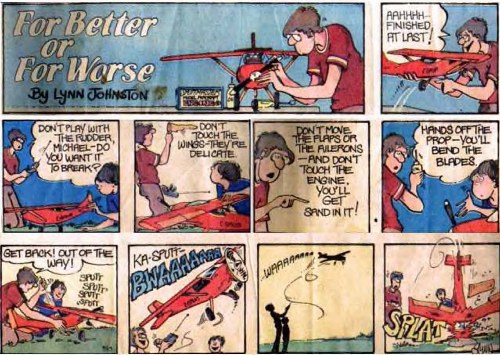
Kids
Kids are inquisitive all the time and especially when it comes to our rc planes. We need to be polite and take their feelings into consideration when we tell them to keep their little grubby hands off our planes. If we are not courteous to them this will probably happen to us.
 |
According to Lin Smith
By James Goss
We never get too old to learn new tricks of our trade. I was talking with Lin Smith today while setting around the table at the Munford field and he gave me some information that I thought was ingenious. Lin informed me that he had been changing the color of his APC props by dyeing them and that really caught my attention. I have used Rit dye for dyeing clear canopies many times in the past, but have never even thought of dyeing props. This is a great idea and I thought everybody would like to know about this technique. Lin says this will also work on other nylon hardware such as control horns and push rod exits and the like. According to Lin, black dye works the best and it is a permanent coloring of the props that will not rub off. It is easy to do by getting the water and dye to almost a boil and placing the prop into the water. The longer you leave it in the water the darker the prop becomes. The props Lin showed me were as black as Master Airscrew props. These props were the gray APC props we are all familiar with, but you would never have recognized them. It is a little untidy so Lid says to use a hot plate and do it outside. Thanks Lin for passing on this interesting information. This is what makes me so proud to belong to this wonderful hobby, the sharing of information and the association of fine club members such as Lin Smith. Keep up the good work Lin!
|
Digital Servos / Programmable Servos
By James Goss
It seems that our radio equipment keeps getting better and better as time go by. Where will it stop? Can they really get any better than they already are? I mainly use Futaba radio gear, always have and probably always will. Futaba may not be any better than Hitec, JR, or Airtronics equipment, but I started with Futaba so I stayed with them over the years. I know one of my reasons for staying with the same brand radio was based on not getting the chargers mixed up because I strap all the inline diodes so I can cycle the batteries without removing the battery from the radio. I feel that Futaba and all the other radios on the market today use the same technology and that one is just as good as the other once you get familiar with the idiosyncrasies that each brand has. I feel confident in saying today's radios are reliable and accurately do what they were designed for. Over the last twenty-five years we have seen our radios go through some major changes with the advent of integrated circuits and then the intelligent integrated circuits with their large-scale integration support peripheral chips. The microprocessor chip has changed our hobby for the better and has given us the ultimate in remote control for our planes.
If Nicola Tesla was alive today and could see how advanced his ideas have come I am sure he would not believe his eyes. Most modelers do not know that Tesla developed the first R/C system around the year 1890 with his crude radio controlled submarine he designed. His transmitter was a huge high voltage and high frequency device that generated electrical arcs that would radiate through he air and be received by an equally crude receiver. We don't hear much about Tesla's work even though he held 700 patents in the states and other countries. I think he was one of our greatest scientists the world has produced and yet he died poor. There have been many people involved in the development of this wonderful hobby but lets give credit where credit is due. The person who first visualizes an idea has already done the hard part. Next month look for an article on Tesla and his part in developing radio control.
Of course as the radio transmitter progressively improved over the years so did the servos. The early servos were referred to as analog because the control voltages would vary in amplitude and conventional analog amplifiers were used that had to amplify and switch on many levels of voltage instead of just two as in digital. For the motor to move forward a transistor would switch on and allow current to flow through the motor's armature. A feedback pot (variable resistor) would send a signal back that would cancel the forward bias on the transistor and switch it off when the servo reached its destination. At this time the servo is at idle and is at a neutral position. The motor will hold a mechanical load at neutral because as the load tries to move the servo arm in the opposite direction, the feedback pot is moved and thus allows current to flow through the armature again. When you give the servo a command to turn by moving your control stick, you are telling either the forward or reverse transistor to conduct more and the motor responds by moving in that direction. Analog servos work well and twenty years ago I probably said how in the world could anybody improve these servos?
The new servos are called digital because they use a format that is digital by design. To be called digital a system must use the binary number system, base 2. The binary system only uses 1's and 0's as compared to the decimal system that uses the numbers 0-9. Usually if a circuit is turned on it represents a binary 1 and when off it represents a binary 0. This actually depends on if you are using negative or positive logic. It takes a lot more space to represent a number in binary format compared to our decimal system that we use every day of our lives. For example in our decimal system 100 stands for the number one hundred. In binary the value of one hundred would be represented by 1100100, where each place value is twice the previous, while in the decimal system each place value is ten times the previous. So when you hear the name digital you would think of the binary number system being used instead of the decimal system to represent a voltage value. For example in positive logic 5 volts can represent a binary 1 and three volts or less can represent a binary 0. The advantage of digital is that there is less chance to make an error by using only 1's and 0's to represent a voltage level. Now don't get me wrong, digital involves a lot of logic circuits that can get pretty involved and requires a lot of specialized training to really understand the operation of a digital system.
Digital circuits still use the same type of electronic components that have been around for many years, it's just that they have been miniaturized and some specialized chips added for their support. Basically the digital servo is the same as the analog servo in that it has the same type motor, feedback pot, gears and case. Where it defers is that it has a microprocessor that analyses the input signal from your radio receiver and controls the motor. A microprocessor is just a fancy name for a rather large integrated circuit that uses basic computer circuitry for its operation. It usually has its own clock (oscillator) that times everything and also has various input and output ports for signals to enter and exit. It also must have memory of some sort so it can store and retrieve data. The analyzed data that exits the processor is a low level signal that usually operates or drives a field effect transistor ( FET) of the MOSFET family to control the current through the dc motor, either cored or coreless. (Check out my article on coreless servos on my web site) MOSFET's are high power, fast switching solid-state devices that give the tremendous holding power that the digital servos are noted for.
The advantage of the digital servo is in the way it can precisely control the power to the servo motor and match preset parameters to the incoming signal before the power is applied to the motor. With analog servos the motor received 50 pulses per second, with digital it receives 300 per second, per second, or each and every second. This is where the holding power comes into play along with the high current FET's. Of course energy is not free and we have to pay a price for this extra holding power. That price comes in the form of extra heat as well as added current drain on our batteries. Some of the main selling features for digital servos are the higher resolution, less dead band, faster control response, constant torque, and increased holding power when stationary. Most of these terms are self-explanatory but let me define a couple of them for you. Resolution describes how many increments the motor shaft will stop at on its journey to its target destination. With 300 pulses per second you can see that there is a great difference between the 50 found in an analog servo. This is why the digital shaft appears to turn so much more smoother that the analog servo. Dead band describes the output of a servo not responding for a small level input. In other words you move the control stick and the servo does not move. I always relate this to an old automobile where you could turn the steering wheel a little each way and the wheels would not move. Constant Torque implies that the twisting power of the motor shaft remains the same throughout the travel of the arm.
The newest servos are the programmable ones. These are the same basic digital servos with added input control by the user. The user can talk to the servo through a programming device and alter some of the servo's main characteristics such as end point adjustment, center adjustment, servo transit speed, dead band, and failsafe settings. This is really handy if you are going to gang two, three, or four servos on a single control surface to prevent the servos from fighting each other at their neutral point and draining the battery.
|
By Unknown Artist
See if you can guess who the artist is! The cartoon is in reference to the TRCC field and an event that happened last month. Send your guess to me by e-mail and I will anounce the winner next month. The winner will be charged a $10 sympathy tax because this newsletter operates on a zero dollar budget.
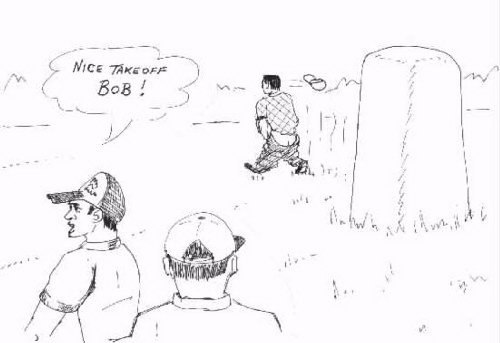 Cartoon by ???
|
Bob's Flight School
Here is an extremely good idea for pilot safety while flying. It offers the ultimate in safety as well as comfort while your plane is in the air. Bob says it is a little warm in there, but the peace of mind is worth it. Bob also says he recommends this approach because you will never forget to extend your antenna before you fly and have to see your plane fly into the far off trees. It also helps to teach you not to fly directly over your head where you may loose orientation of your plane. By and large I feel this is a worthwhile idea and we should have one at every flight station.
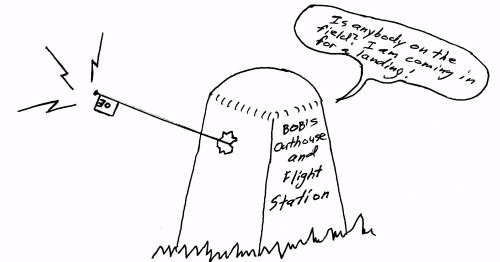 Cartoon by
James and Cecil
|
For What Is It Worth?
By James Goss
Here is a tip that really does work well.
If I was a man that lost his cool easily, there is one thing in this R/C hobby that would sure do it, and that is spray paint in a can. I guess I have used hundreds of spray paint cans over the years and I can't remember ever having one that would spray ok after I used a small amount from the can and then try to use it again several days later. Sometimes the spray cap stops working even with a new can that has not been sprayed before. I have built a nice paint shaker for spray cans and it really works nice, but that doesn't keep the spray cap from clogging after use. I have tried compressed air to clean the caps, pins to stick them, knife blades to slice them, small drill bits to auger them, and even a few choice words, but with seldom any progress. After 30 years of spray painting I have finally discovered a way to clean the little spray cap that actually works every time I have tried it. After I started using this method I wondered why I have been so long coming up with this idea. Immediately after I spray the paint I pop off the cap and place it in a 35 mm film canister, the white one, and cover it with acetone. If I am going to paint again in a few minutes I will shake the canister to speed up the process. If I am not going to use it anymore that day I will place the canister top on and let the cap soak until I need it again. Here is the handy part, tape the canister to the spray can with the cap and acetone inside and it will be with the can when you need it, maybe six months later. It will spray like a new can of spray paint when you do get around to using it again. Remember to still invert the can and clear the pickup tube by spraying until the paint stops coming out after each spraying. This really does work and if you never try any of my suggestions this is one that you should examine.
|
Recent E-mail
#1
James,
Sorry it took me so long, but I've finally gotten around to getting some digital pics of at least my postage stamps! I clicked them kind of quickly Sunday evening, so I haven't had a chance to get Rickey or Rick's yet... but I'll try to snap them maybe next weekend. As you can see, I've built another one now... so I've got 2. The second one (the blue and orange striped one) was sort of a community effort... most of the radio stuff is
Rickey's, with the hardware and building falling under my hand (not sure sure how good that is!). MAN ARE THESE THINGS FUN! I test flew the new one yesterday... it hovers even better than the first! I think the CG is a bit better for hovering than the other one. It also does a TERRIFIC power on spin, transitioned from a hover, into the runway (ask me how I know)! Very minor damage, though... I've just got to replace the rudder servo... <grin> Power on the new one, by the way, is a new TT Pro .36.. WAY more than enough
juice! I'm turning a MA 11x4.
At any rate, you need to come over and fly with us again soon... and check out the infection you've spread with these infernal flying cardboard contraptions! One of my new favorite things to do with them is to come in low and slow, almost to a hover, then hit full power and full elevator into a quick, low loop, then come back on the power again... transitioning back into slow forward flight. Nothing hard, but it looks kind of neat.
Anyways, I'll talk to you later. I just wanted to (finally) fulfill my promise and send you these pictures!
See ya...
-Barry McGrady
|
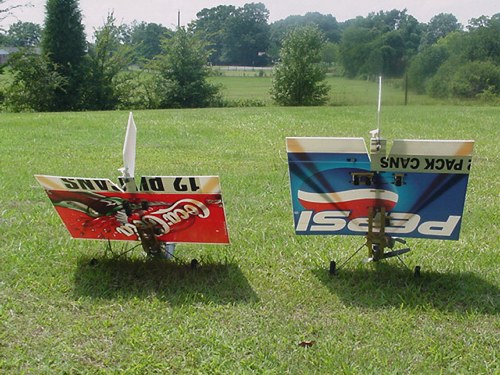
Here you see Barry's new Postage Stamp planes and they really do look nice. Several R/C pilots in the Sylacauga area are now building and flying the Postage Stamp planes. This is the easiest to build, cheapest and most fun plane you will ever fly.
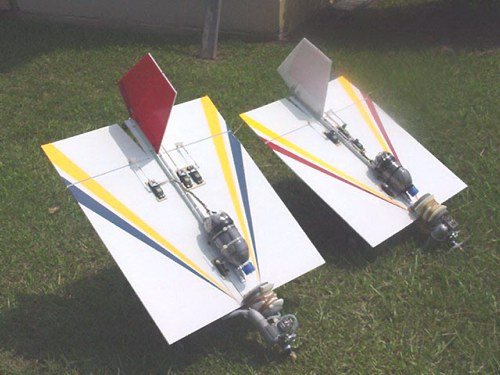 |
Barry should get paid for this kind of advertising.
I wonder if that is a coke and pepsi bottle that Barry has his flight pack in?
 |
Tool of the Month
I finally got around to getting a wood planer for my shop. I had planed on using it for some large home improvement projects I had under way, but to my surprise I haven't used it for that task as of yet. What I have used it for is to plane maple motor mounts and basswood stock for my models. It will handle the tiny pieces of hardwood that we work with the most and I am really impressed with how well it does it. It is fast when dressing wood down and produces some of the prettiest finished wood you can imagine. The wood doesn't really need sanding after it goes through the planer because it is already very smooth. I don't see how I ever got along with out it because it is so convenient when you need that special piece of wood to complete a project and you have just got to have it right now. The brand I have is DeWalt and I purchased it at Lowes. It cost about $300, but you will forget about that after the first time you use it. It's a tabletop model and is very compact to store when not in use. I am sure there are many planers out there that will work just as well and if you haven't thought you really need one, that is the same thing I said.
|
E-mail
James
My name is Bruce. I'm from WA State. I would like to know if you could help me come up with a use for a 36" PBF I built. It has an OS46FX and landing gear on it and it flies very well when it's calm. When it's just a little bit windy the thing is uncontrolable. I put 5/32 piano wire in the LE and TE. It makes it a more stable flyer but I'm just not having fun with it like I have with a 24" PBF and a bearing 40. I see where you have several flying disks on your site and thats what I thought I might be able to do with my large PBF. Any suggestions would be greatly appreciated. I can send pictures of the large PBF so you can see how I have laid things out if that would help.
Thanks very much, Bruce (propcut)
Hello Bruce,
That is a rather large box to be built with 4 mm coroplast; I would like to see it. I was just planning to build another flat disk, but build it like my Stamps with no fuselage. Here is an idea for your 36-inch box. Simply cut it into a 36-inch circle and leave all your controls where they are now. Let the elevons be part of the circle so the plane will be a true circle. It should fly without the music wire in the leading edge because the circle cut will strengthen itself. It will have about 300 less square inches of wing, but it will still have 1017 square inches. Keep the balance in about the same location as in the original version. This will be something different and it will only take you about 15 minutes to build it. Good luck!
James
|
RC Universe Post
Will your Pizza Box hold a knife-edge? The Postage Stamp will hold a knife-edge by installing large wing tips on it. Looks neat in the air while holding a knife-edge. It looks like a large I-beam flying through the air. I have experimented with several sizes, but the five-inch seem to be the best. They are five inches wide and run the length of the wing and are equally spaced with 2 ½ inches above and below the wing. Of course they alter the balance point a little and you can forget about flat spins, the big tips prevents that maneuver. The tips are installed with three two-inch long 10 32 nylon screws and flat washers on each wing tip. You dont have to screw them in, they just plug in and out for a quick change at the field, and this method works great. Just something a little different and a change of pace.
 |
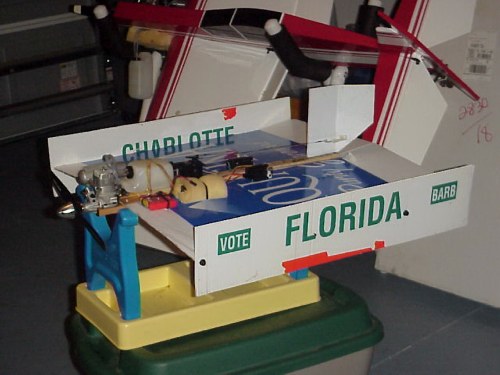
RC Universe Post
James,
Read your post this morning, added the wing tips in about 15 min, went out, flew it and was very happy with the performance. It really will knife edge now and all of the out of control spin tendencies are gone. Thanks for the idea. I too would like to see the skies full of these flat planes, can't wait for others in my area to get them flying so that we can try combat.
RC Junky
Sunny Florida
 |
Vertical Landings
By James Goss
What type of aerobatics do you like to see our R/C planes do in the air? What is your favorite maneuver? I guess everybody likes to see loops, rolls, and stall turns and there is probably more of these done than any other maneuver. When you stop and think about it most of the pattern maneuvers are built from these three, loops, rolls, and stalls. These are the first exciting stunts we learn when we commence flying R/C and when you mix these three stunts together we can come up with some pretty exciting flying. If you have a plane that will fly in a knife-edge position you can add even more complication to the maneuvers and the list goes on and on.
Most planes will perform at least some of the above maneuvers, but there are some stunts that are highly specialized and require a special purpose plane that has features to allow it to do these unearthly moves in the air. These include upright flat spins, inverted flat spins, tumbles of all kinds, pinwheels, knife-edge loops, hover, torque roll and other 3-D maneuvers. While all these stunts are great and the planes that perform them, as well as the pilots, are highly specialized, there are not many planes around that have the capability to do one of the most fascinating maneuvers in airplane history. Take a guess at what you think this maneuver would be. It involves the stall, and when done right it appears to be the most graceful maneuver in the book. If you make a mistake while attempting this stunt most planes will be destroyed. If you are successful in completing this stunt you will feel that it is the most rewarding experience. As you have probably guessed by the title of this article I am talking about the vertical landing.
This is a maneuver that you don't see very often and for a good reason. Most R/C planes cost a great deal of money and we don't want to risk loosing them in a stunt such as this even if it is a wonderful maneuver to see, and this includes giant scale as well as small scale. A lot of pilots, giant scale and fun fly, will hover their planes and descend down and touch their tails on the ground and then pull back up. This requires a lot of skill and practice and is a good 3-D maneuver, but you don't see them setting their plane down for a landing this way. The reason in part is because getting the plane to set down without having its rate of fall to be excessive is a hard trick to master. Even though the plane is already touching the ground with its tail, the final fall (I call it Timber) is enough to destroy your plane. I have seen giant scale planes fall from less than three feet high while in a hover and they would be completely destroyed. Even a plane that only weighs three pounds can have considerable damage. So we are not going to see this maneuver very often with regular planes.
We now have a plane for the R/C hobby that defies all the above reasons why we shouldn't try the vertical landing. As most of you have already seen this plane you will know what I am talking about. I call my version the Postage Stamp, because it can be flown in such a small space and I am really glad I have created it. I started flying the Stamp about a year ago and have been at it ever since. I just can't seem to get away from these little magical planes. Of course I was already due for a change of pace after building several giant scale planes. To look at these little flat planes you wouldn't even think they would fly, much less be aerobatic. They are a little more difficult to fly, but anyone can learn to fly them with a little practice. I remember when I first started flying these planes I had some pretty scary events to unfold. Once I landed one of these planes on the highway next to the Eastaboga field and I was lucky there was no traffic on the road at the time I landed. It was a beautiful landing though even if I did miss the field. I can also remember seeing Pat Thomas running for cover while talking on his cell phone at the Munford field. I can also remember chasing one of these planes across the field during a run away and tumbling across the field myself, boy did I hurt the next day. I will be the first to agree that this plane is an unorthodox plane and everybody has a right to laugh at it and I would be the first in line to laugh. I didn't get discouraged with any of the mishaps and now I can fly them about as well as any of my other planes. Actually I think these little planes can improve anyone's flying ability and will help an R/C pilot no matter what style of flying they are involved with. It will help develope what I call orientation awareness any you will become a better R/C pilot. I know I have a lot more confidence in my ability to fly R/C planes now than I did before I started experimenting with flat planes.
Once I learned how to fly with the throttle everything seemed to come together and I was doing maneuvers that I had only dreamed of in the past. Throttle control is the key to having a successful flight with the Postage Stamp or any flat plane. You will find yourself constantly adjusting the throttle, even in a simple turn around, especially a tight turn. The best vertical landings are created by bringing in the plane at about 40 feet above the runway and at a moderate speed. Stall the plane by turning up its nose and enter a hover. Let the plane settle and stabilize somewhat and then begin the descending pattern. To achieve this you reduce the throttle and see how fast the plane drops. You control the drop by throttle and elevator. If the plane is dropping too fast give it more engine power or less elevator. Of course if you reduce the elevator the plane might move forward unless you reduce throttle also. The vertical landing looks better if the plane doesn't move forward after you start the descent. It doesn't take long to work the stamp to within a foot of the ground. Give it a little power and let the tail softly touch the ground. As it begins to timber (fall to the ground) bring up the power and she will sit down just as pretty as you please. Give it full throttle and she will be back in the air in less that ten feet.
The tail end on the stamp turns out to be the business end and that requires a strong tailskid to handle the shock of hitting on the tail constantly time after time. A tail wheel is not needed, just the skid built from 3/32 music wire. With the skid you can walk the plane around on its tail all day long and it will still be good as new. The main gear needs to be at least 1/8-inch music wire and be long enough so the prop will not hit the ground if on occasion you set down a little harder than normal. Of course you will still have a lot of engine restarts because you are flying around at one or two feet above the ground, so naturally the prop is going to hit the ground from time to time. Usually with the stamp the only thing damaged is a broke prop every now and then. So again let me say that I had rather see a plane perform a vertical landing than any other maneuver I know of. Its grace and agility even makes this $10 airplane something to behold.
|
Soldering
By James Goss
What type of soldering equipment do you have around your work area? Sooner or later you will need to do some soldering in this hobby and having the right soldering equipment will help. Basic soldering is an easy skill to learn and most people can solder with just a few tries. There are two basic types of soldering equipment, the pencil or soldering iron, and the soldering gun. The soldering pencil is called a pencil because it is a long and slender tool shaped like a pencil. Pencil type irons come in sizes between 15 and 60 watts on the average, but can be larger in size. Pencil type irons are good for small jobs and are good for production work because they stay hot and ready to go when you need them. It takes a while for these to heat up because they have a heating element that has to heat up and transfer the heat to the tip. It takes a few minutes for the tip to reach its operating heat, but when it does, it is just as hot as the bigger soldering guns. The difference is that the pencil's tip will drop in temperature when placed on an object to be soldered. The low wattage element can't supply enough heat and will allow the tip to drop in temperature. Remember that this type of soldering device stays hot so be careful where you lay the pencil down and don't burn its line cord or your hand.
A good solder to use with the pencil iron is a 60/40 tin and lead. I like to use .030-diameter rosin core solder. This solder melts at around 370 degrees F. The rosin is a cleaning agent that is activated by heat and will allow the solder to bond to the base metal. Rosin core solder should always be used in our hobby, never acid core. I saw a pushrod the other day that a friend of mine had used acid core solder on. The rod had corroded and broke under load, it was on his elevator so he had a hard landing. Acid core is fine for sheet metal and radiator repair, but not around electrical devices because of corrosion.
For soldering large music wire a soldering gun makes the job much easier. A soldering gun operates on a different principle than does the soldering pencil. The gun has a transformer in the handle that transforms the 120 volts AC down to less than one volt, but delivers around 40 or 50 amps to the soldering tip. So it is the circulating current through the tip that heats it. Current flow through a resistance will create heat. Most soldering gun tips are equal to 10-awg copper. You can make your own tips from number 10 awg solid copper building wire and they will heat just as well as the bought ones.
To solder large music wire start by sanding the wire with some 150-grit paper to get it shinny. Then clean the wire with alcohol several times to remove all oils. Place some flux on the wire in addition to the flux in the core of the solder. You can buy rosin flux (past) in a small can at any hardware store. This past will really allow the solder to bond to the music wire and will not come loose in the future. I like to use a 210-watt Weller soldering gun for large jobs such as this because it is quick and efficient. Weller makes one of the best guns on the market for the type of soldering we need to do in our hobby. A gun such as this will come up to heat in a few seconds and will maintain that heat a lot better than a pencil.
The 210-watt soldering gun works fine, but if you want even faster results you can use a propane torch instead. It will bring the music wire up to heat a lot faster and ensure a better bond also. With a propane torch you will need to use a larger diameter solder than the .030 mentioned above. This is because you will need a faster flow of solder than can be provided with the .030 solder. A 1/8-inch diameter rosin core will work fine, but if you don't have any that large and you do have the small size, here is what you can do. Simply twist six or eight pieces of the small.030 diameter solder together and this will be even better that the 1/8-inch solder because it will have better flux control. Apply the heat to the wire and not the solder; let the hot wire melt the solder and not the flame.
For a really strong connection with music wire try this. Overlap the wires a couple of inches after they have been prepared as above. Wrap the two wires with some small copper wire over the two-inch overlap, keeping it tight as you go. You can get the small copper wire by stripping some 12-awg stranded wire and removing one strand. Fill the wire with flux and apply the heat. You will see the solder wick throughout the connection. When the wire is full of solder remove the heat and allow it to cool. You will have the best connection that can be made with solder.
Always keep the soldering gun tip tight. Heating and cooling over and over will cause a loose connection at the tip. This is the most common trouble when a gun stops heating. Also clean your tip often because the flux residue will build up on the tip. You can clean the tip by brushing it on a wet rag of sponge between each solder job.
|
Recent E-mail
#2
Mr. Goss
I live in Evanston Wyoming and I think your plane is pretty cool. I am a member of The Bear River Modelers. I would like to use these as combat models for our club. How much would you charge to sell me five of these ready to install engine and radio. And how fast could you have them completed and ready to ship?
Jim Estes
Hello Jim,
I am glad you are interested in the Postage Stamp fun fly plane. I can guarantee you will love it if you are into fun fly planes, there is nothing like seeing it do a vertical landing and all the other maneuvers as well. It is not designed as a high-speed plane, but can be flown fast for short periods of time. I am working on a design at this time that will be a high speed Stamp. I do think it would be a fun plane to use in a combat competition. I haven't built any to sell at this time. I only build them for our club members and give them away free of charge, or course I can't keep this up much longer. I just wanted to get things going and start the Stamp movement.
I will be able to build you five Stamps within the next two weeks if everything goes as I have planed for $50 each. I will need to know what engine you will be using so I can set the maple engine rails for the engine's crankcase. The TT .36 pro is a fine match as well as the little OS .46 LA. They both have plenty of power on this plane. Any engine in that range will probably do a fine job, but the lighter engine to weight ratio does a better job hovering around in a nose up attitude (high alpha flight). It takes about two days for me to build one from scratch. I will have less than $20 in materials for each plane, this includes hard maple engine rails that works really well, ½-inch aluminum channel for the spine, all hardware needed to fly the plane. Everything such as the control horns will already be installed ready to attach to the servos. So I would be charging for the labor of assembly only. You will need to furnish the 2.5 - inch light foam wheels and a 6 oz fuel tank. For shipping, the vertical fin will need to be screwed onto the aluminum channel spine after you receive the plane,
If you would like to build them yourself I have the instructions on my web site that explains how to assembly them. If you would like for me to build them at the above price, let me know. I will pay for the shipping. Again let me say that I am not trying to make any money off my Stamps, I simply want to get the word out about how much fun they are to fly. James Goss
|
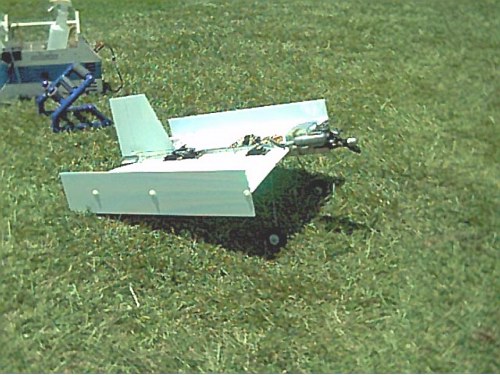
Twin inline rudder Postage Stamp
I had flown this palne the other night, but only hovered it near the ground because it was getting dark. Today I put it through the ringer and put the sticks to the corners. It does a great flat spin at a very high rate of rotation. To get into the flat spin I stall it and give max throttle, max left rudder, max up elevator, and bring the ailerons toward the right. When it starts to flat spin, and it only takes one or two rotations, I bring the aileron stick back toward neutral and let the rudder do the work, the rotation really increases. If you bring the aileron stick back far enough the nose will point up a little and the plane will stop descending and even gain altitude. Inverted flat spins are great also. I did have one mishap though. The plane was about 75 feet high at mid field and I guess I just lost it and gave it the wrong inputs because it came straight down, of course I gave max throttle to pull it out at the last moment, I thought, but it hit the ground wide open. This was the hardest hit I have seen on this type plane. Proud to say it only broke the prop. I know for sure that these planes are the toughest, most durable, most indestructible fun fly planes on this planet.
I think the twin rudder is a worthwhile project and I can recommend it to all my fellow flyers. I plan to build more of them and not only do they look really neat in the air, it is an easy modification while building the Stamp or PBF. It is also easy to remove the front fin and convert it back to your regular plane. Really I dont think you will want to remove the fin once you have seen it in the air. I have attached a picture in case you forgot what it looked like.
 |
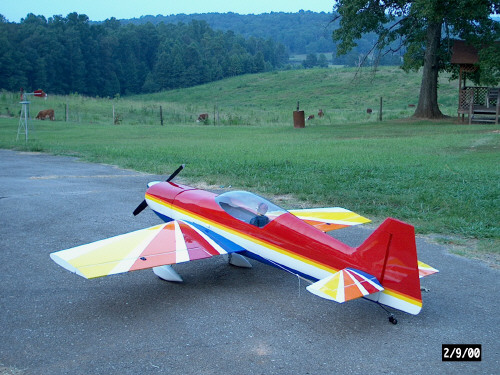
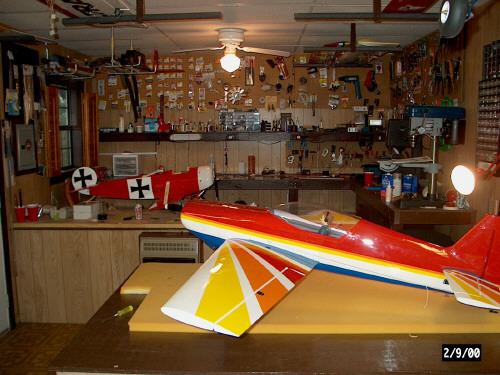
This is Wayne's new Giles and it looks like it is ready to go. We should be seeing it at the field soon. Nice workshop Wayne, what maid service do you use?
  |
Cleaning Your Mouse and Trackball
By James Goss
The trackball is basically an inverted mouse. Instead of moving the mouse around with your hand the mouse is inverted and mounted stationary so you can move the ball with your hand or fingers. The advantage of the trackball is that it is stationary so it can be incorporated into desktop keyboards and laptop and notebook computers. Pointing devices such as the mouse and trackball are perhaps the simplest peripheral available for your computer. They are forgiving to wear and tear of everyday use, but they can be fouled or even disabled by excess dust, debris, and other foreign matter you may have in the environment where your computer calls home. Contamination will almost never damage your mouse, but it can create some weird problems when the mouse is in operation. About once a year if you will clean your mouse in the following manner it will stay in good operating condition for many years.
Remove the ball: The ball is held in place with a retaining ring. For a mouse the ring is on the bottom. For a trackball the ring is on top. Rotate the ring and remove it, the ball will fall out. Place the retaining ring in a safe place.
Clean the ball: Wash the ball in warm soapy water and dry it thoroughly with a lint-free towel. Place the ball in a safe place.
Blow out the dust: Use a can of photography-grade compressed air to blow out any dust or debris that has accumulated inside the mouse.
Clean the rollers: The mouse has three rollers; an x roller, a y roller, and a small pressure roller that keeps the ball pressed against the x and y rollers. Use a cotton swab dipped in isopropyl alcohol to clean off any gunk that might have accumulated on the rollers.
Reassemble and test: Allow everything to dry completely, and then replace the ball and retaining ring. Use it for another year and repeat.
|
Installing Great Planes Faslinks
By James Goss
I guess we have all used Great Planes Faslinks or other brands that are similar to them. They are about the fastest way I know to connect pushrods to control horns or servo arms and are very reliable. Out of the hundreds I have used I can only remember about two that actually came off during flight. I like the Faslinks better than z-bends because they have less slop and are easy to remove for servo service if needed. Thinking back about the two Faslinks that came off during flight, it may have been due to the way I installed them. I now know there is a right way and a wrong way for their installation. There are two possible ways to install these links based on how you install the pushrods. You will install the 90-degree bend in the pushrod either from the top of the servo arm or from the bottom of the arm. This will allow the slot in the link to be facing up or down. The links will work either way but one way the link is in danger of coming off. While working in the shop the other day I was installing the flight pack and was checking everything out when I noticed one of the Faslinks popped off the servo arm. What had happened was the servo arm where I had removed one side of the arm to make it a single arm had a small hump that didn't get removed when I cut the arm off. When the faslink was traveling toward the servo arm at the max range of travel, the hump pressed against the Faslink and popped the link off. I could see that if I had rotated the pushrod 180 degrees in from the other side of the arm, the hump would have pressed the link toward the pushrod instead of away from it. This is so simple I have over looked it for years. The next time you install links to your servo arms you can check this out, there is a right and wrong way to install them. If you can stay away from using the maximum range of travel you will be better off, but in come cases you need all the travel you can get, so be careful.
|
Picking Up The Pieces
By James Goss
You might think this is the beginning of a really good crash story and the pilot had to pick up a lot of tiny pieces of balsa in the vicinity of the crash, like I have done on numerous occasions. Actually this deals with picking up those little aggravating pieces of hardware that we all use in this hobby. We all know how irritating it can be to try and pick up a 2-56 nut or washer with our clumsy fingers. It just will not stick to our fingers so we find our forceps or some of our magnetic tools to pick it up. I have written about this before, but I feel it may help some of our new members to read about it. If you will place a piece of foam, about an inch thick and six inches square, near your workstation it will solve this problem of clumsy fingers. Simply keep the small hardware that you are currently using on this foam. You will be able to use your fingers and pick up the tiniest piece of hardware as if it was a coke can. It is truly amazing how well this works and in a years time, if you only pick up 500 tiny parts, I have calculated that you will save at least 5 hours of your valuable time. I figure I pick up about 10,000 tiny parts each year so I save 83 hours. This is based on the fact that you will spend at least 30 seconds trying to pick up a tiny washer, and longer if you drop it on the floor.
|
Well that's all for this month and I hope you found something of interest to read about. Check back next month and see if we are still around and remember, if you are not crashing, you are not flying enough. Good luck!
|